Since I'm sort of rusty at this DIY thing now, I decided to start really easy...I mean DIY 101. Don't laugh...OK? I just wanted to do something a little different on the back deck this year. I didn't get pictures at the onset of this project, but then I decided to share it in blog-land and grabbed my phone for pictures. Here we go...
It started with this...

and these...

It all originated from a "plan" with red and yellow that I came up with. Next is where I have no pics until I decided to share this...and this is where I was in the process by then...STEP 1

Can you tell that it's a terracotta dish for the outside pot? Yes, and a can of yellow spray paint! The fun had started...and I had already finished one in another color.
Next, after it was dry, I added the dirt...STEP 2

Insert plant...STEP 3

Voila...here it is (not too good of a pic though-sorry!)!
Here is the other one...

Birds really need to be replaced (not up for DIY'ing that my dears!) They have lived out here for several years now, in different spots, and have faded. Easy replacement...trip to store!
I was well pleased with my projects...but there was yet another easy one to do...

Simple...put dirt in planter...put plants in...this was a TWO-STEP one..."easy breezy" my friends. (Remember, I asked you not to laugh!) I really just took a picture of this one to show you my amazing hosta. They are always so huge...and now get this...I don't do anything at all to them except water them about twice a week in really hot weather...that's it. Nada! I love these because they are not high-maintenance. They get the morning sun and they must thrive on that. However, the grasshoppers tend to LOVE them too because later in the summer they start eating on the leaves...any of you know something not harmful (to them or pets) that may just ward them off?
OK, and then there is this ugly thing...

It is SO old and just looks bad to the bone...don't ya think? No, that's not mildew around the edges, but just where it's faded and flaked off. I really like the swag design on it...so I thought to myself...what could I do for it. I got the bright idea to try and just glaze it with stain. So, I had hubby to get me some stain, a brush, and some rags out from his workshop and I got started.

I had NO CLUE as to what I was really doing so I just used the brush and started applying the stain and then wiping it off. Not too sure I even liked this but I continued on to see...

By the time I had finished the top ring I decided to scrap the brush and just use my cloths to put the stain on and then dab it off. The brush method would have taken me FOREVER (small brush...and lack of patience maybe?). Again, not too sure I even liked it at all.
Done, finally...I was going for an old world style...and here it is finished. It actually looked a little better in person than here...but I knew I...DID NOT LIKE IT AT ALL!!!! After 2 1/2 hours...Yuck!

So I quit for the day...and again had no clue what I was going to do, but I was determined to come up with something. Remember, the yellow and red pots with yellow and red flowers were going all out on my deck...what in the world did I want to do now?
It didn't take long really to come up with PLAN B. I would go to Lowe's and look for a lime green spray paint...not too bright and not to "army" green....hum. Let's go see!
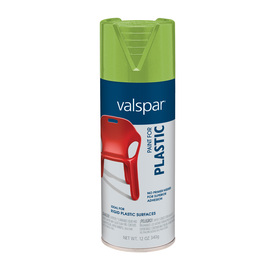
Here is what I came home with...Apple! I think this one may be a winner.

Exactly "the look" I wanted out there and I revived this ugly planter...DRAB to FAB with just three coats of the "right" color (it's a little brighter than it shows here)! Now I just need these plants to grow-grow-grow to balance the size of the container!
And just in case you are wondering what I made for the front porch...it was two of these...

If you look closely you can see a pine needle hanging on the right side (on the ivy streamer). There is a reason I'm telling you this!

And, look a little closer and you can see that the liner is sort of coming apart (pieces are pulled out). See it? It wasn't this way when I bought these hanging pots (oh, and the DIY part was me selecting the plants I wanted to use in them and then making them myself). I told you this was DIY 101...
Back to my story...well, you can't really see in this one close enough...

Maybe this will work...see the bird's nest (front left)? Yep, they weren't up long at all before the birds tried to pull the liner out to make the nest with, I assume. When they didn't get much pulled out, just messed it up a bit is all, they went to the pine needles and filled the front porch with them...but got the job done. A perfect, tightly woven, little bird's nest...aren't they amazing? Such little creatures and so highly talented...I vote that to be the DIY of the day...the bird's handmade (well, beak-made) nest!!! I don't have the heart to mess with it so I will just water it and leave them alone.

That is it...all of my DIY Weekend up close and personal. Hope my simple little projects didn't bore you too much...all I know is they made me HAPPY! Oh, and thanks for not laughing at the Skill Level here...Beginners/Easy!
Did YOU have a DIY project this weekend?
Have a "Simply Irresistible" Day!
All images are property of Simply Irresistible Designs unless otherwise linked or noted.
I would not say it was as simple as you are calling it. I can appreciate how many steps it took to get it right. That green pot is perfect now. Good for you for not giving up.
ReplyDeleteYou are right...it may be easy steps but it does indeed take time and patience. Glad you think the green on the planter makes it perfect now! Thanks! I am pleased with the outcome too. Enjoy your day!!
ReplyDelete